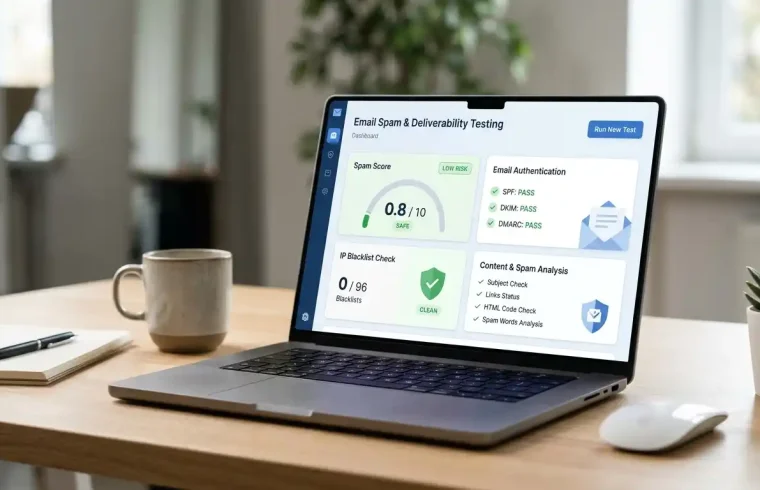
Sending an email doesn’t guarantee it will reach someone’s inbox. Your message might land in the spam folder, get rejected by the receiving server, or fail because of an email authentication problem.
A spam checker helps you identify potential problems before they affect your email campaigns or business communication. Depending on the tool, you can test an email’s content, review authentication records, check an IP address against blocklists, and find issues that could affect delivery.
Whether you send newsletters, WordPress notifications, contact form messages, or business emails, checking your email setup can help you find problems before they become harder to diagnose.
In this guide, you’ll learn how to use an email spam checker, understand spam scores, perform an IP blacklist check, and test mail deliverability.
What Is a Spam Checker?
A spam checker is a tool that examines an email or its sending setup for problems that could prevent messages from reaching recipients.
Different tools perform different checks. Some analyze the wording, links, and formatting of an email. Others examine email authentication, server reputation, or the status of an IP address on public blocklists.
An email spam checker may help you identify:
- Email content that resembles common spam patterns.
- Missing or incorrectly configured SPF, DKIM, or DMARC records.
- Links or formatting that may raise concerns.
- IP addresses listed on supported email blocklists.
- Technical issues that could affect email delivery.
For example, if your WordPress contact form sends messages successfully but those messages keep landing in Gmail’s spam folder, a spam checker can help you investigate the problem.
However, no checker can guarantee inbox placement. Email providers use their own filtering systems, reputation signals, and recipient behavior when deciding where messages belong.
Why Should You Use an Email Spam Checker?
Email delivery problems can be difficult to diagnose because a message may leave your server without reaching the recipient’s inbox.
An email spam tester gives you a starting point for investigating those problems.
1. Find Email Authentication Problems
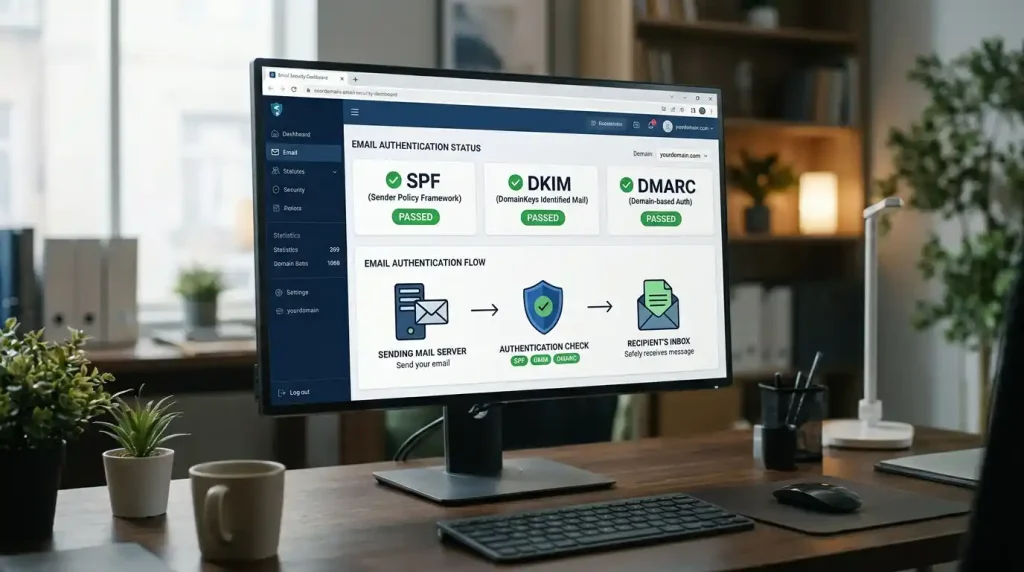
Email authentication helps receiving servers verify that a message is authorized to use a particular domain.
Three important standards are SPF, DKIM, and DMARC.
- SPF: Identifies the servers authorized to send email for your domain.
- DKIM: Uses a digital signature to help verify that a message is associated with an authorized sending domain and has not been altered in transit.
- DMARC: Tells receiving servers how to handle messages that fail the domain’s authentication and alignment requirements.
Incorrect records can cause authentication failures. A testing tool can help you identify missing records, configuration mistakes, or alignment issues.
2. Check Your Email Content
Spam filters evaluate more than individual words. They may consider links, message structure, sender reputation, authentication, and other signals.
An email spam checker can flag suspicious elements such as misleading links, unusual formatting, or excessive promotional language.
Treat these warnings as clues rather than proof that an email will be marked as spam.
3. Investigate IP Reputation
An email server’s IP address may appear on a blocklist if the address has been associated with unwanted email or other activity that the list tracks.
An IP blacklist check helps you determine whether the address appears on the blocklists examined by the tool.
This can be especially useful if your website suddenly experiences email delivery failures.
4. Troubleshoot WordPress Emails
WordPress websites often send password reset links, order notifications, contact form messages, and other automated emails.
If these messages are missing or arriving in spam folders, testing the sending configuration can help you narrow down the cause.
You may need to check your SMTP settings, domain authentication, sending provider, or server reputation.
How to Use a Spam Checker
The exact process depends on the testing service, but most email testing tools follow a similar workflow.
Step 1: Choose an Email Spam Tester
Choose a reputable tool that explains what it checks and what its results mean.
Some tools analyze message content, while others focus on authentication or delivery. For a useful diagnosis, choose a service that tests the parts of your setup relevant to the problem.
Avoid entering passwords, private customer information, or sensitive business messages into an unfamiliar testing website.
Step 2: Send a Test Email
Many email testing services provide a temporary test address.
Copy that address, send a message from your usual email platform, and return to the testing service to review the results.
If the tool asks you to send a test message, use the exact address and instructions it provides.
For a WordPress website, send the test through the same SMTP plugin or email service that handles your normal website messages. This makes the result more useful than sending a message through an unrelated account.
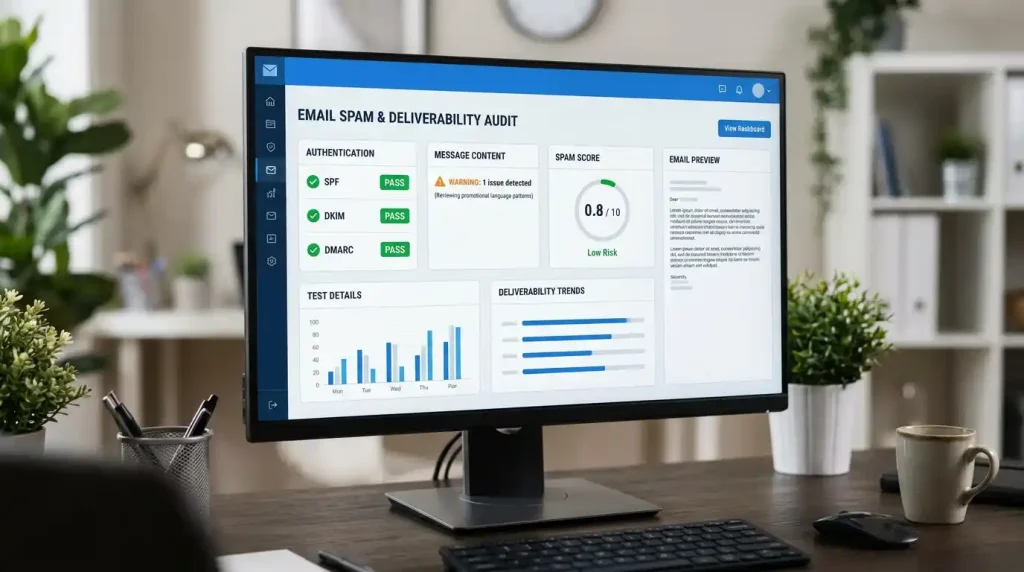
Step 3: Review the Spam Score
A spam score is a tool-specific assessment of possible spam-related issues.
Some services use numerical scores, while others provide warnings, categories, or pass-and-fail results.
Read the tool’s explanation before interpreting its score. A lower score may indicate fewer flagged issues in one service, but another service may use a completely different scale.
Look for specific findings, including:
- Failed authentication checks.
- Suspicious or broken links.
- Missing sender information.
- Formatting concerns.
- Reputation or blocklist warnings.
Fix the underlying problems instead of focusing only on the final number.
Step 4: Check SPF, DKIM, and DMARC
Review the authentication results for your sending domain.
If SPF fails, confirm that your domain’s SPF record authorizes the correct sending service.
If DKIM fails, check the signing configuration and the DNS record supplied by your email provider.
If DMARC reports an alignment or policy problem, review the From domain and the domains used by SPF and DKIM.
Do not add multiple SPF records to the same domain. Multiple SPF records can cause authentication problems. Update the existing record according to your provider’s instructions.
Step 5: Run an IP Blacklist Check
If the email tester reports a reputation problem, identify the public IP address used by your sending server.
Check that address with a reputable IP blacklist checker. Review which blocklist reports a listing and whether the list is relevant to your email delivery problem.
If a listing appears, investigate its cause before requesting removal. Depending on your setup, you may need help from your hosting company or email provider.
Step 6: Send Another Test
After correcting the reported issues, send another test email.
Compare the new results with the original report. Confirm that authentication passes, relevant warnings have been addressed, and the message reaches the intended test inbox.
A successful test is useful evidence, but it does not guarantee that every recipient’s provider will deliver future messages to the inbox.
Best Spam Checker Tools to Test Email Deliverability
The best tool depends on what you want to test. Some services focus on message analysis, while others help with domain authentication, reputation, or delivery diagnostics.
The following services are useful starting points.
1. Mail-Tester
Mail-Tester analyzes a test email and provides a report with findings that may affect its spam rating or delivery.
It can help you identify configuration issues and review parts of your message that need attention.
Use it when you want a straightforward test before sending an email campaign or troubleshooting a message.
Website: https://www.mail-tester.com/
2. MXToolbox
MXToolbox offers DNS diagnostics and email-related checks, including tools for examining IP addresses against supported blocklists.
It is useful when you need to investigate DNS configuration, mail server records, or a possible IP reputation issue.
Website: https://mxtoolbox.com/
3. Google Admin Toolbox
Google Admin Toolbox provides diagnostic utilities for domains and internet services. Its Dig tool can help you inspect DNS records and confirm what information is publicly available for a domain.
Use it when checking whether your email authentication records are published correctly.
Website: https://toolbox.googleapps.com/
4. GlockApps
GlockApps provides email deliverability testing and inbox placement analysis. Depending on the service and plan, you can use it to investigate how test messages are handled by different email providers.
It can be useful for marketers who need more detailed deliverability testing.
Website: https://glockapps.com/
Which Tool Should You Choose?
| Your Goal | Suggested Tool |
|---|---|
| Analyze a test email | Mail-Tester |
| Check an IP address against blocklists | MXToolbox |
| Inspect DNS records | Google Admin Toolbox |
| Investigate inbox placement | GlockApps |
These tools serve different purposes, so you may need more than one. Check each service’s current features and plan limits before relying on a particular test.
What Is a Spam Score Checker?
A spam score checker estimates how many potential problems a message or sending setup has according to its own testing rules.
The term does not describe one universal scoring system. A score from one service cannot automatically be compared with a score from another.
For example, a tool might flag a missing authentication record, while another might focus more heavily on message content or inbox placement.
How to Interpret Your Spam Score
Use the report to find the issues that matter most.
Authentication failures: Check SPF, DKIM, DMARC, and domain alignment.
IP reputation warnings: Confirm whether the sending IP is listed on a relevant blocklist.
Content warnings: Review suspicious links, misleading wording, and unnecessary formatting.
Delivery problems: Confirm that the receiving server accepted the message and determine where it was delivered.
Do not assume that a perfect score means every email will reach the inbox. A spam score is one diagnostic signal, not a universal prediction of delivery.
How to Perform an IP Blacklist Check
An IP blacklist check helps you investigate whether an email server’s public IP address appears on one or more blocklists.
These lists may be used by email providers and server administrators to help identify sources associated with unwanted messages.
Follow these steps to investigate a possible listing.

Step 1: Find Your Sending IP Address
Your sending IP depends on your email provider and server configuration.
If you use a third-party SMTP service, its servers may send your messages. If you use shared hosting, the IP may be shared with other customers.
Check your provider’s documentation or ask its support team to identify the sending IP used for your messages.
Step 2: Check the IP Address
Enter the IP address into a reputable blacklist-checking tool, such as MXToolbox.
Review the specific lists reporting a match. Different blocklists maintain different policies and data, so a listing on one service does not automatically mean every major email provider will block your messages.
Step 3: Investigate the Cause
Before requesting removal, determine why the IP was listed.
Possible causes include unwanted email activity, a compromised website, poor sending practices, or problems involving a shared server.
If you use shared hosting, contact your hosting provider. You may not control the server’s IP reputation yourself.
Step 4: Follow the Removal Process
Each blocklist has its own removal procedure. Follow its instructions after addressing the underlying problem.
Do not repeatedly submit removal requests without fixing the cause. If the issue continues, the address may be listed again.
How to Improve Email Deliverability
A mail deliverability tester can help you identify delivery problems, but improving results often requires changes to your email setup and sending practices.
Configure Email Authentication Correctly
Publish the SPF, DKIM, and DMARC records required for your sending services.
Follow the DNS values supplied by your email provider. Avoid copying records from an unrelated domain because the correct configuration depends on your setup.
Use a Reliable SMTP Service
For WordPress websites, sending mail through a properly configured SMTP service can provide better control over authentication and delivery than relying on the server’s default mail configuration.
Choose a provider that fits your website’s email volume and needs. Configure its recommended host, port, encryption, and authentication settings.
You can read our guide to SMTP and how it works for more information. Replace this temporary link with the URL of your published SMTP article before publishing.
Keep Your Email List Clean
Remove invalid addresses and stop sending to recipients who have unsubscribed.
Use confirmed opt-ins where appropriate, and avoid purchasing email lists. Sending repeated messages to people who did not ask for them can damage your sender reputation.
Write Clear, Honest Messages
Use a subject line that accurately describes the email. Make sure links lead to the destinations they claim to represent.
Include your business identity and a working unsubscribe method for marketing emails where required.
There is no single list of words that automatically sends every email to spam. Focus on honest messaging, relevant content, and proper technical setup.
Monitor Your Sending Reputation
Monitor delivery errors, complaint rates, and authentication results.
If you use Gmail to send mail to personal Gmail accounts, Google’s official sender guidance explains the requirements that apply to different sending volumes and types.
Read the Google email sender guidelines for current guidance.
How to Test WordPress Email Delivery
If your website sends contact form messages, password resets, or notifications, test those messages using the same sending system your site uses in production.
1. Check Your SMTP Plugin
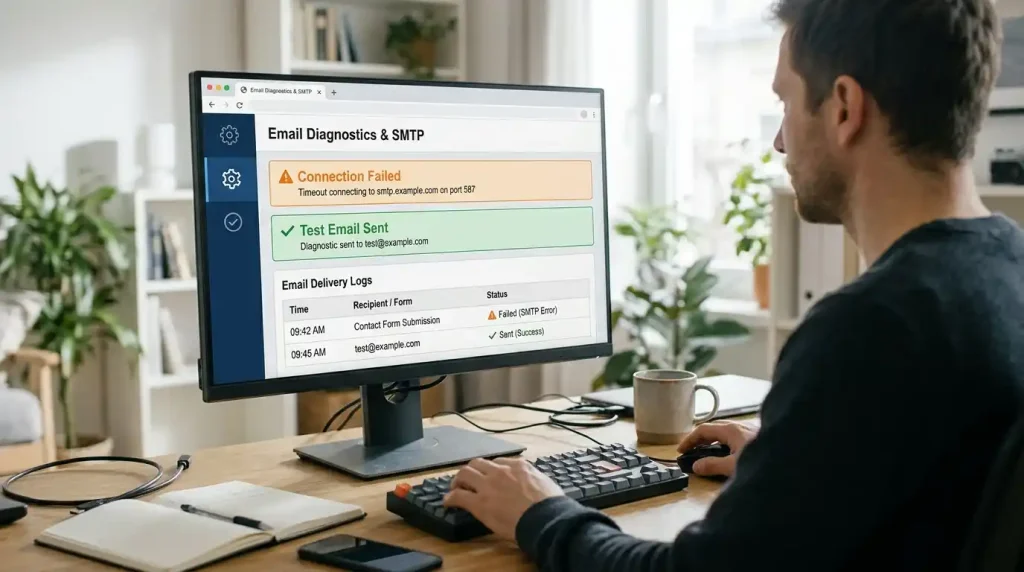
Confirm that the SMTP plugin is connected to the correct mail provider.
Check the hostname, port, encryption method, and authentication details against the provider’s documentation.
2. Send a Test Email
Use your plugin’s test-email feature if available. Send the message to an inbox you can access.
Check whether the plugin reports an error and whether the message arrives.
3. Review Email Logs
If the message does not arrive, check your plugin or provider’s logs.
A successful sending response does not always prove that the message reached the recipient’s inbox. The receiving server may accept the message and place it in spam, or later reject or filter it.
4. Test the Message With a Spam Checker
If the email arrives in spam, use an email spam tester to review authentication, message content, and other reported issues.
Correct the specific problems found by the test and send another message.
For additional troubleshooting, see our guide on fixing WordPress email delivery problems. Replace this link with the URL of the relevant published article, or remove it until that article exists.
Common Email Spam Checker Problems
Even when you use a spam checker, the results may not explain every delivery failure.
The Test Shows a Good Score, but Emails Still Go to Spam
A good score does not guarantee inbox placement. The receiving provider may consider sender reputation, previous complaints, recipient engagement, and other signals.
Review the delivery provider’s logs and authentication results rather than relying on the score alone.
Your IP Is Not Blacklisted, but Emails Are Rejected
An IP blacklist check only covers the lists examined by that tool.
A rejection may result from authentication failures, server policy, recipient restrictions, rate limits, or another reputation issue.
Read the full rejection message and contact your email provider if the cause is unclear.
SPF or DKIM Fails Even Though DNS Records Exist
A published record can still be incorrect or inconsistent with the service sending your email.
Check the exact domain used by the message, confirm that the sending service is configured correctly, and compare your DNS records with the provider’s instructions.
The Email Checker Reports Different Scores
Different tools use different tests and scoring methods. One tool may flag an issue that another does not measure.
Read the detailed findings and prioritize verified technical problems over small differences between numerical scores.
Frequently Asked Questions
What Is the Best Free Spam Checker?
The best option depends on what you need to test. Mail-Tester is a useful starting point for analyzing a test email, while MXToolbox can help investigate DNS and IP blocklist issues. Check each service’s current free-use limits.
How Do I Check Whether My Email Will Go to Spam?
Send a test message using an email testing service, review its report, and check your authentication records. You can also send the message to test inboxes you control. No test can guarantee where every recipient’s provider will place the message.
What Does an Email Spam Score Mean?
A spam score summarizes potential issues according to a particular tool’s rules. Its meaning depends on the service, so read the report’s explanation instead of comparing scores from different tools directly.
How Do I Check Whether My IP Address Is Blacklisted?
Identify the public IP address used by your sending server, enter it into a reputable IP blacklist checker, and review the results. If a relevant listing appears, investigate the cause and follow that blocklist’s removal procedure.
Can a Spam Checker Improve Email Deliverability?
A spam checker can identify problems that may affect delivery. You must still correct the underlying issues, maintain good sending practices, and monitor actual delivery results.
Why Are My WordPress Emails Going to Spam?
Possible causes include missing authentication records, poor sender reputation, incorrect SMTP settings, or message content that triggers filtering. Test your actual WordPress sending setup and review the results to narrow down the cause.
Final Thoughts
A spam checker is a useful first step when your emails are not reaching the inbox. It can help you review message content, check authentication, investigate IP blocklists, and identify delivery problems.
Start with a test email, read the detailed report, and fix the problems it identifies. For WordPress websites, make sure your SMTP service and domain authentication are configured correctly.
Regular testing can help you catch problems earlier, but successful email delivery still depends on your sending practices and the systems receiving your messages.