How to Migrate a WordPress Site Manually
Moving your website to a new hosting provider can feel complicated, especially if you have never managed a WordPress migration before. You may be experiencing slow loading times, limited server resources, rising renewal costs, or poor customer support. Whatever your reason, learning how to migrate WordPress site properly can help you move your website without unnecessary downtime or data loss.
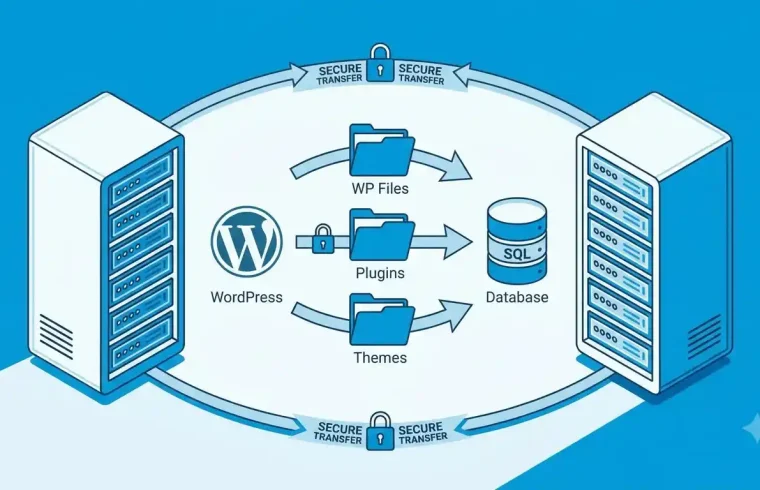
A WordPress migration usually involves transferring your website files and database, configuring the new hosting environment, testing the website, and updating your domain’s DNS settings when necessary. The exact process depends on your hosting providers, website size, and migration method.
In this guide, you will learn how to prepare for migration, move your WordPress website manually or with a plugin, test the new installation, and decide when a professional website migration service may be useful.
What Is WordPress Website Migration?
WordPress website migration is the process of moving a WordPress website from one hosting environment, server, domain, or installation to another.
For example, you might move a website from one shared hosting provider to another, upgrade to managed WordPress hosting, or transfer a website from a development server to a live domain.
A typical hosting migration involves transferring:
- WordPress core files and folders.
- Themes, plugins, and uploaded media.
- The WordPress database, including posts, pages, and settings.
- Configuration details required by the new hosting environment.
- Email or DNS settings, if these are included in your migration plan.
Not every migration requires every step. Moving to a new host while keeping the same domain is different from changing both your hosting provider and domain name.
Why Migrate a WordPress Site?
There are several reasons website owners decide to move their WordPress installations.
1. Improve Website Performance
If your current hosting plan lacks sufficient resources, your website may struggle under heavier workloads. A more suitable hosting environment may help, although performance also depends on caching, plugins, themes, images, and application configuration.
2. Reduce Hosting Costs
Hosting prices and renewal rates vary. Comparing providers may help you find a plan that better matches your budget and resource requirements.
Check the renewal price, contract length, backup policy, migration fees, and included features before switching.
3. Get Better Customer Support
If your current provider cannot resolve recurring technical problems, another provider with more suitable support options may be a better fit.
4. Access Better Features
You may want staging tools, automatic backups, security monitoring, newer software versions, or easier WordPress management. Check that these features are included in the specific plan you are considering.
5. Prepare for Website Growth
A growing business website, blog, affiliate website, or online store may eventually require more resources or a different hosting setup.
If you are comparing hosting options, read our guide to WordPress hosting services, provided that this URL is published and accessible on your website.
How to use wordpress for beginners : https://sitecrafthub.blogspot.com/2026/10/use-ai-wordpress-tips.html
What to Do Before Migrating Your WordPress Site
Preparation is essential. Before starting the migration, complete these steps.
1. Create a Complete Backup
Back up your website files and database before making changes. Store a copy somewhere separate from your existing hosting account.
Your backup should include your WordPress files, themes, plugins, uploads, configuration files, and database. The exact backup procedure depends on your hosting control panel or backup tool.
2. Choose Your New Hosting Provider
Confirm that your new hosting plan meets WordPress’s current technical requirements and provides enough resources for your website.
Review the provider’s backup features, support availability, security options, migration policy, and renewal pricing.
3. Record Your Current Website Settings
Document important details such as your WordPress version, PHP version, database information, DNS records, email configuration, and installed plugins.
Do not copy passwords or secret keys into public notes. Store sensitive configuration information securely.
4. Check Your Domain and Email
If you are keeping the same domain, you generally do not need to register another one. However, changing nameservers or DNS records can affect email services if the existing records are not preserved.
Before changing DNS, record the relevant DNS entries and confirm where your email is hosted.
How to Choose a WordPress Theme That Fits Your Website: click here
5. Schedule the Migration Carefully
For a busy website or online store, choose a period with relatively low traffic. If users can submit forms, publish content, or place orders during migration, plan how to handle changes made while the site is being transferred.
A final database synchronization may be necessary for sites that continue receiving new data during the move.
Method 1: Migrate a WordPress Site Manually
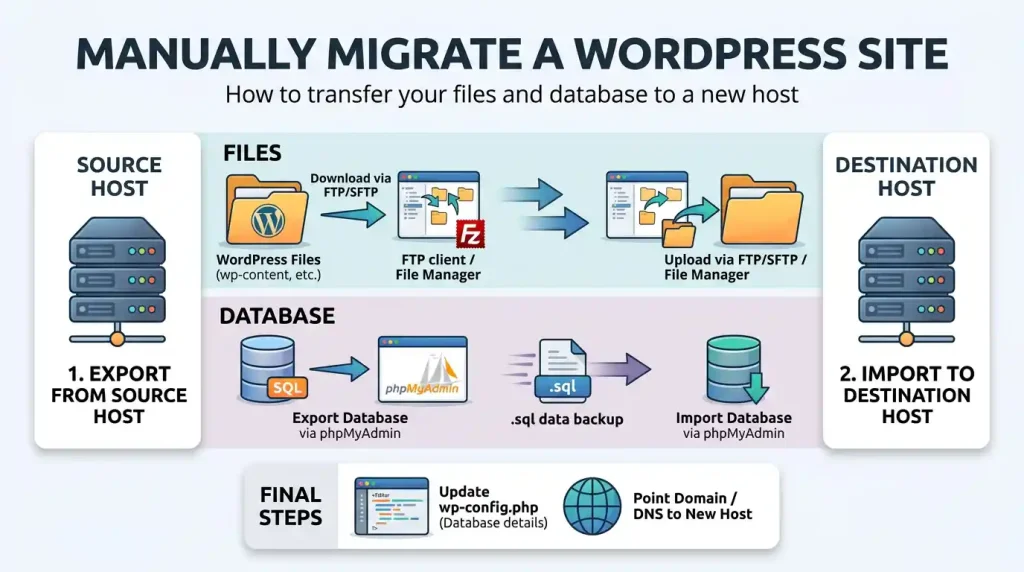
Manual migration gives you control over the process, but it requires access to your hosting control panel, file manager or FTP/SFTP client, and database tools.
The steps below describe a typical migration when you are keeping the same domain.
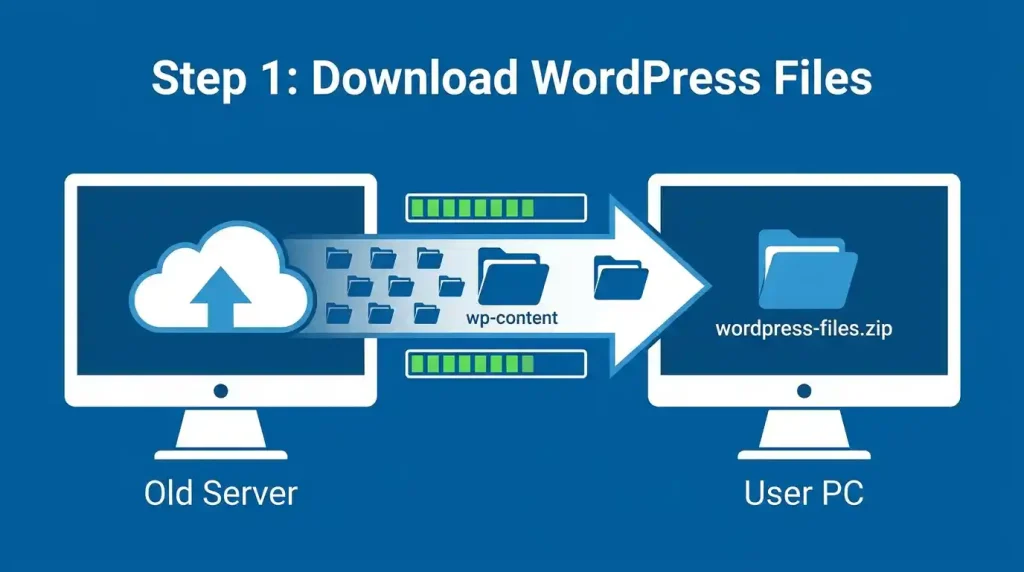
Step 1: Download Your WordPress Files
Log in to your existing hosting account and open its file manager or connect using an appropriate FTP/SFTP client.
Locate your WordPress installation directory. Download the website files, including the wp-content folder and the relevant configuration files.
The exact directory varies by hosting provider. Make sure you are downloading the correct website if your account contains multiple installations.
Step 2: Export Your WordPress Database
Open your hosting provider’s database management tool, commonly phpMyAdmin, and select the database used by your WordPress installation.
Export the database as an SQL file. Keep the exported file secure because it can contain private website information.
If you do not know which database your site uses, inspect the database settings in wp-config.php without sharing its credentials publicly.
Step 3: Create a Database on the New Host
In your new hosting control panel, create a database and a database user if the provider requires it.
Assign the necessary permissions to that user. Record the new database name, username, password, and host value because you may need them during configuration.
Step 4: Upload Your Website Files
Upload your saved WordPress files to the correct document root on the new server.
Check that the files are in the intended directory rather than accidentally nested inside an extra folder.
Step 5: Import the Database
Open the new database management tool and import the SQL file into the database you created.
For large databases, your hosting provider may offer a command-line import method or another supported migration tool. Follow the provider’s instructions if the web interface has file-size or execution-time limits.
Step 6: Update Database Configuration
Configure the WordPress installation to use the new database details.
The relevant settings are typically stored in wp-config.php. Update the database name, username, password, and host value as required by the new provider.
Keep the configuration file private and avoid publishing its contents.
Step 7: Test the Website Before Switching DNS
If your new host supports a temporary URL, staging environment, or hosts-file testing, use it to verify the migrated site before changing public DNS.
Check the homepage, important pages, images, navigation, forms, login, and any essential plugins. Some hosting environments need additional configuration before the site can be tested properly.
Method 2: Use a WordPress Website Migration Plugin
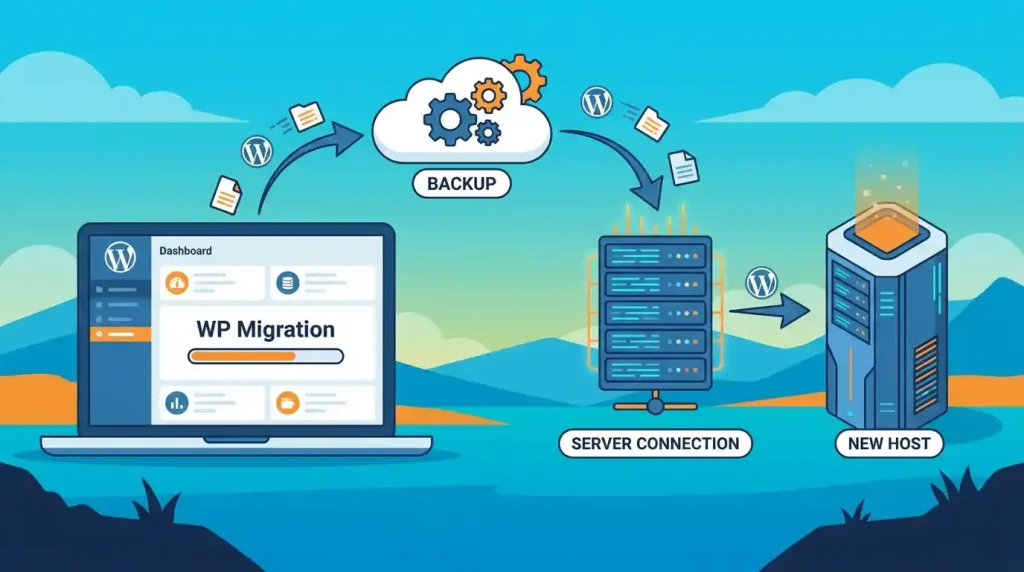
A WordPress website migration plugin can simplify parts of the process by packaging website files and database content or guiding you through a transfer.
Plugin capabilities, free-plan limits, supported server environments, and import-size restrictions vary. Review the current documentation before choosing a tool.
Step 1: Choose a Suitable Migration Plugin
Look for a plugin that supports your WordPress version and the size of your website. Check the provider’s documentation, update history, compatibility details, and any import or export limitations.
Never assume that every plugin can transfer every website without additional steps.
Step 2: Create an Export or Migration Package
Install and activate the selected plugin on the source website.
Follow its documented procedure to generate an export, backup, or migration package. Store the resulting files securely.
Step 3: Prepare the New WordPress Installation
Depending on the plugin, you may need a fresh WordPress installation or a compatible destination environment. Follow the plugin’s official instructions rather than combining steps from different tools.
Step 4: Import the Website
Install the required migration tool on the destination site and import the package using its documented process.
If the upload exceeds the allowed file size or the server times out, check the plugin’s official troubleshooting guidance and your host’s limits before retrying.
Step 5: Verify the Migrated Website
Once the import is complete, sign in to the destination website and inspect the pages, images, links, plugins, and settings.
Check for missing media, incorrect URLs, PHP errors, and plugin conflicts. Do not switch DNS until you are satisfied that the new installation is ready.
How to Transfer a WordPress Website to a New Host
When the new installation has been tested, you can prepare to make the new server live.
Step 1: Confirm the New Site Is Ready
Verify that the new website contains the latest files and database information. If visitors can submit orders, comments, or forms, confirm that no recent data will be lost during the switch.
Step 2: Preserve Existing DNS Records
Before updating nameservers or DNS records, record the existing configuration. Pay particular attention to email-related records and any third-party services connected to your domain.
Changing nameservers without preserving the required records can interrupt email or other domain services.
Step 3: Update DNS Settings
Use your domain registrar or DNS provider to update the relevant records to point visitors to the new hosting environment.
DNS changes can take time to be reflected across networks. The timing varies based on caching, TTL settings, and the DNS configuration.
Keep your previous hosting account available during the transition if possible.
Step 4: Install or Verify SSL/TLS
Make sure the new host has a valid certificate for your domain and that the website loads over HTTPS.
If your website uses HTTPS, verify that internal links, images, and resources do not cause mixed-content warnings.
Step 5: Test the Live Website
After the DNS change begins taking effect, test the website using the domain name.
Review the homepage, key landing pages, forms, search, login, analytics, redirects, and any checkout process. Test on desktop and mobile devices.
Step 6: Keep the Old Hosting Active Temporarily
Do not cancel the old hosting account immediately. Keep it available until you have verified the new website, checked email and DNS behavior, and confirmed that important data has been transferred successfully.
For sites that receive frequent updates, make sure the new installation remains synchronized during the transition.
Common WordPress Migration Problems and How to Fix Them
Even a well-planned migration can reveal configuration problems. Here are several common issues.
White Screen or Server Error
A white screen or server error may result from incompatible plugins, PHP issues, file permissions, or incomplete transfers.
Check the server error logs, confirm software compatibility, and temporarily disable problematic plugins only when you can do so safely.
Database Connection Error
Verify the database name, username, password, host, and permissions in your WordPress configuration.
Make sure the database exists and that the user has access to it.
Missing Images or Broken Links
Check whether the uploads directory was transferred correctly. Inspect the affected media URLs and confirm that the relevant files exist on the destination server.
If your domain or directory structure changed, you may need to update stored URLs carefully.
Redirect or HTTPS Problems
Review your WordPress URL settings, HTTPS configuration, and redirect rules. Check whether a plugin, server configuration, or CDN is applying conflicting redirects.
Migration Upload Fails
Large migration packages may exceed upload limits or server execution limits. Check the plugin’s documented requirements and ask your hosting provider about supported import methods.
Avoid repeatedly changing server settings without understanding the effects.
When Should You Use a Website Migration Service?
A website migration service may be useful if your website is large, your store receives regular orders, you have multiple websites, or you are uncomfortable handling files and databases.
A professional service may help with:
- Transferring website files and databases.
- Configuring the destination environment.
- Checking redirects and URL behavior.
- Testing important pages and website functions.
- Planning DNS changes and minimizing disruption.
Before hiring a provider, confirm exactly what the service includes. Ask whether email migration, DNS changes, database synchronization, SSL configuration, testing, and post-migration support are covered.
A migration service cannot eliminate every risk, so a verified backup and a clear recovery plan remain important.
WordPress Migration Checklist
Use this checklist before considering the migration complete.
- Back up the website files and database.
- Confirm the destination hosting plan is compatible.
- Transfer the latest website files and database.
- Verify database and WordPress configuration.
- Test key pages before changing DNS.
- Preserve email and other required DNS records.
- Configure and verify HTTPS.
- Check images, forms, links, and essential plugins.
- Test the live website after DNS changes.
- Keep the old hosting available until verification is complete.
Final Thoughts
Learning how to migrate a WordPress site can help you move to a more suitable hosting environment while reducing avoidable problems. The key is to prepare carefully, create a complete backup, transfer both files and database content, test the destination website, and update DNS only when you are ready.
A migration plugin may simplify the process for a straightforward website, while manual migration provides greater control for users who are comfortable managing hosting files and databases. For complex websites or busy online stores, a professional website migration service may be worth considering.
Whichever method you choose, do not rush to cancel your old hosting plan. Verify the new website, preserve important DNS records, and confirm that essential functions work before treating the migration as complete.
Frequently Asked Questions
How do I migrate a WordPress site to a new host?
Create a complete backup, transfer your WordPress files and database to the new host, configure the destination installation, test the website, and update DNS when the new site is ready.
What is the easiest way to move a WordPress site to a new host?
For many straightforward websites, a compatible migration plugin or migration service can reduce manual work. The best method depends on website size, server compatibility, and the tool’s limitations.
Can I migrate WordPress without a plugin?
Yes. You can transfer the website files and database manually using your hosting control panel, file transfer tools, and database management tools.
Will migrating my WordPress website affect SEO?
A hosting migration does not automatically mean your rankings will fall. However, downtime, broken links, incorrect redirects, missing pages, or HTTPS problems can affect crawling and user experience. Test the website carefully and monitor it after migration.
Do I need to change my domain name when moving hosts?
No. You can generally keep the same domain and update its DNS settings to point to the new hosting environment.
How long does WordPress website migration take?
The time depends on website size, database complexity, upload speed, server access, DNS configuration, and the migration method. A small website may be relatively quick to move, while a large or frequently updated website can require considerably more planning.
Should I cancel my old hosting account immediately?
No. Keep the old hosting active until you have verified the new website, confirmed the necessary data has been transferred, and checked that important domain and email services continue to work.