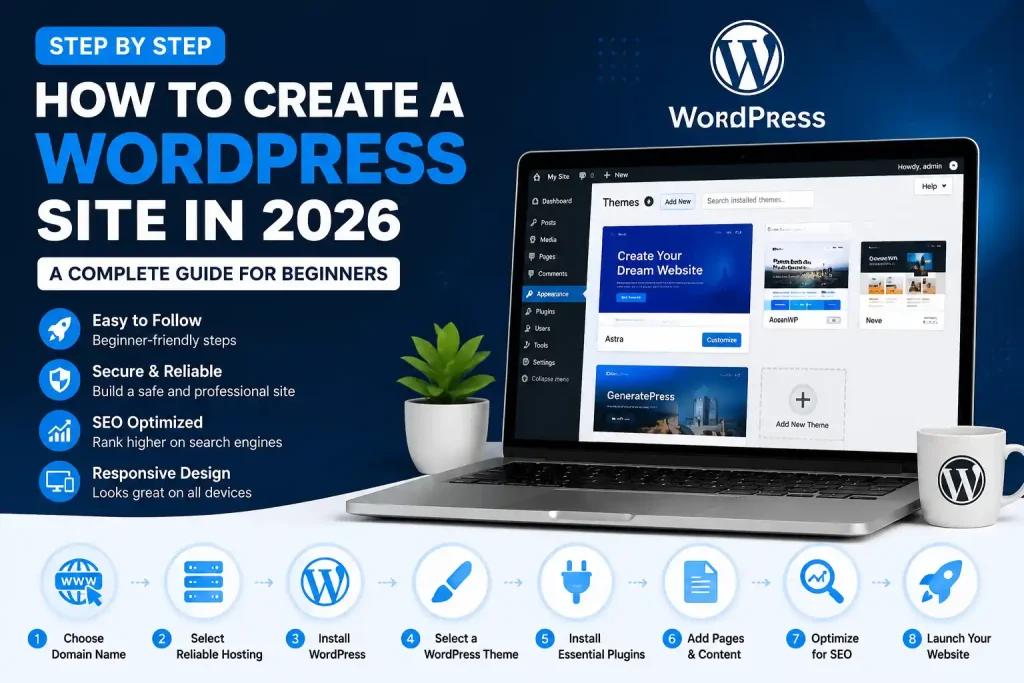
How to Start a WordPress Website in 2026. Starting a website used to require a team of developers, thousands of dollars, and weeks of custom coding. In 2026, the digital landscape has shifted towards absolute democratisation. Whether you want to launch a personal blog, a professional portfolio, a local business page, or a high-volume e-commerce storefront, building a professional online presence is entirely within your reach.
Today, WordPress powers over 43% of all websites on the internet. This market dominance isn’t an accident. It is the direct result of a highly flexible ecosystem that pairs total ownership of your data with intuitive, code-free visual design tools.
If your goal is to build a web property that ranks organically on search engines and satisfies Google AdSense’s strict quality compliance guidelines for monetisation, you need a structurally sound, deep-coverage asset. This definitive, step-by-step blueprint will guide you through the entire process from an empty domain to a live, secure, revenue-ready WordPress site.
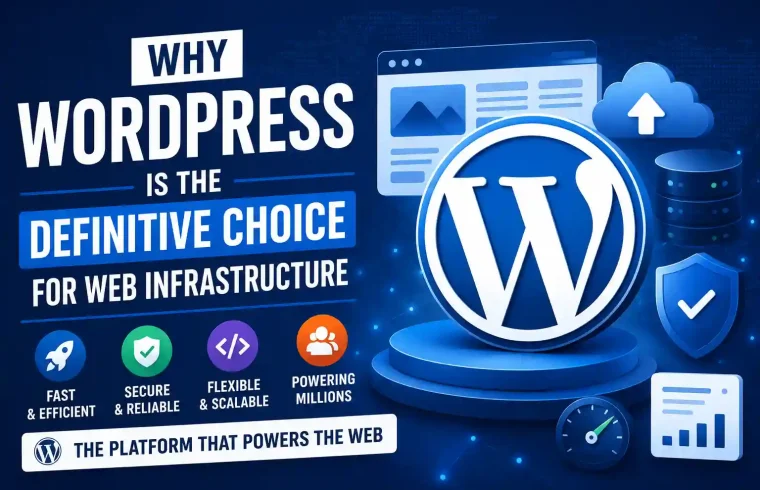
Why WordPress is the Definitive Choice for Web Infrastructure
When planning an online venture, choosing the right foundational software is the most critical decision you will make. While closed-ecosystem website builders like Wix, Squarespace, or Shopify offer simplicity, they come with a major downside: platform lock-in. You do not own your site infrastructure on those platforms; you lease it. If you violate their shifting terms of service, or if they increase their monthly subscription fees, your digital asset is caught in their crosshairs.
WordPress (specifically self-hosted WordPress.org) is open-source software. You have complete data autonomy. You can host it anywhere, modify any line of code, and monetise it exactly how you see fit without paying a percentage of your revenue to a parent corporation.
Key Architectural Advantages
- Total Data Autonomy: You completely own your files, databases, and content assets. No third-party platform can suddenly shut down your business or restrict your monetisation methods.
- Visual Building Paradigm: The era of writing manual HTML, CSS, or PHP to change a layout is over. Modern WordPress relies on block editors and advanced drag-and-drop engines like Elementor or core block themes, allowing you to manipulate complex multi-column grids visually.
- Deep SEO Native Architecture: WordPress’s core codebase is written to be inherently scannable by search engine web crawlers. It features clean permalinks, logical category hierarchies, and seamless integration with technical SEO engines.
- Unmatched Ecosystem Scale: With over 59,000 free plugins and thousands of themes, there is no technical feature—be it a booking engine, a forum, or a premium membership payroll—that cannot be integrated with a few clicks.
Step 1: Choose and Register a Strategic Domain Name
Your domain name is your permanent digital identity. It is the exact address users type into their browsers to find your brand (e.g.). Beyond simple aesthetics, a domain name carries significant weight regarding brand recall, user trust, and baseline semantic signals for search engines.
Framework for Picking a High-Value Domain
- Prioritising the
.comExtension: Despite hundreds of new generic top-level domains (gTLDs) like .com or .org, the.comextension remains the gold standard for global credibility. Users instinctively type.comby default. If your target name is taken on.com, consider changing the name rather than settling for an obscure extension. - Keep it Structurally Clean: Keep your domain name between 6 and 14 characters. Avoid hyphens, double letters (e.g., ‘easily’
wordpresssetup.comcan easily be mistyped as ‘easilly’), and numbers. Hyphens look spammy to users and are difficult to communicate verbally. - Incorporate Broad Topical Signals: While exact-match domains (like
bestcheaprunningpackguide.com) no longer offer direct ranking advantages and can appear manipulative, broad topical signals are highly beneficial. For example, itforgecrafttools.comgives immediate context while leaving room for brand expansion. - Perform Brand Audits Early: Before purchasing, search the United States Patent and Trademark Office (USPTO) database to ensure you are not infringing on existing trademarks. Additionally, verify that the exact handle is available across major social platforms to prevent brand fragmentation.
Vetted Domain Registrars
- Namecheap: Widely recognised for its clear pricing model, zero hidden renewal fees, and included lifetime WHOIS privacy protection (which prevents your personal phone number and email from being scraped by spammers).
- GoDaddy: A heavily utilised global provider, though users should look out for higher renewal rates after the initial promotional period.
- Hover / Google Domains (Squarespace): Streamlined, minimalist alternatives built purely for domain management without aggressive upsell funnels.
Step 2: Select Reliable Hosting Infrastructure
Web hosting is the actual physical hardware (a server) where your website’s files, databases, codebases, and images live. Your choice of hosting provider directly determines your site’s time-to-first-byte (TTFB), overall page load speed, uptime reliability, and defence against brute-force security threats. Google explicitly uses page speed as a core ranking metric via its Core Web Vitals framework. Slow hosting will severely bottleneck your traffic before you even publish your first post.
Understanding Hosting Types
For a new website, hosting options generally fall into four tiers:
[Shared Hosting] ---------> Lowest cost, shared server resources with other sites.
       |
[Cloud / VPS] -----------> Dedicated resource slices, scalable, excellent performance.
       |
[Managed WordPress] ------> Premium pricing, server level tuned specifically for WP.
Shared Hosting
The most budget-friendly entry point. Your website shares a single physical server’s resources (CPU, RAM, bandwidth) with hundreds of other sites. While incredibly cost-effective, a traffic spike on a neighbour’s site can occasionally slow yours down.
- Best For: Brand new blogs, testing environments, and low-traffic portfolio sites.
Cloud & VPS (Virtual Private Server) Hosting
Your site is allocated an isolated, dedicated slice of a server’s resources. Cloud hosting spreads your data across an interconnected network of virtual servers, allowing for instantaneous resource scaling during massive traffic spikes.
- Best For: Rapidly growing content sites, mid-tier business sites, and sites planning aggressive marketing campaigns.
Managed WordPress Hosting
A premium concierge layer built directly on top of high-performance cloud architecture. The server environment is explicitly configured and fine-tuned purely for the WordPress database structure. The host handles automated daily backups, core software updates, server-side caching, and advanced firewalls.
- Best For: E-commerce sites, high-traffic monetisation blogs, and business owners who cannot afford to spend time on technical server maintenance.
Hosting Architecture Comparison
| Hosting Provider | Target Audience | Key Structural Features | Performance Grade | Estimated Monthly Cost |
| Hostinger | Budget-Conscious Starters | Custom hPanel dashboard, LiteSpeed Web Server caching, free weekly backups. | A- (Excellent entry-level speed) | $1.99 – $3.99 |
| Bluehost | Absolute Beginners | Native WordPress onboarding, a direct cPanel dashboard, and 24/7 technical phone support. | B (Standard stable baseline) | $2.95 – $4.95 |
| SiteGround | Performance Seekers | Google Cloud infrastructure, a proprietary SuperCacher engine, and top-tier developer support. | A (High-speed optimization) | $3.99 – $6.99 |
| WP Engine | Enterprise & High Traffic | Fully isolated managed environments, integrated staging setups, and advanced security firewalls. | A+ (Premium tier infrastructure) | $20.00+ |
Step 3: Install WordPress and Configure Your Core Database
Once your domain and hosting account are linked, you need to deploy the actual WordPress software onto your hosting server. Modern hosting environments have largely replaced manual FTP database creations with streamlined, automated one-click installation panels.
The Automated Deployment Workflow
- Access Your Administrative Account: Log in to your hosting provider’s central management control centre (e.g., hPanel, cPanel, or the account dashboard).
- Locate the Automated Application Installer: Look for sections labelled Auto Installer, WordPress Manager, or Website Setup Wizards.
- Specify Installation Details:
- Domain Selection: Choose the exact registered domain you want to use. Ensure you select the clean root directory (leave the directory field entirely blank so the site installs
example.comrather than overwrites). - Protocol Selection: Select
https://from the dropdown to ensure your traffic is encrypted from day one.
- Domain Selection: Choose the exact registered domain you want to use. Ensure you select the clean root directory (leave the directory field entirely blank so the site installs
- Establish Secure Administrative Credentials:
- Critical Security Warning: Change the default administrator username from
admin“or your domain name” to a unique, randomised string. Using a generic username leaves your site vulnerable to brute-force automated login attacks. - Generate an administrative password consisting of a long alphanumeric string containing uppercase letters, lowercase letters, numbers, and symbols.
- Critical Security Warning: Change the default administrator username from
- Execute the Deployment: Click the Install button. The server will automatically spin up the MySQL database, configure the necessary configuration directories, and map your domain.
Initial Administrative Access
Once the script completes, you can access your site’s backend administrative command panel at any time by appending /wp-admin to your domain:
Plaintext
https://www.yourwebsite.com/wp-admin
Step 4: Select and Optimize Your Structural WordPress Theme
A WordPress theme provides the underlying code layout, grid structure, typography engine, and stylistic framework of your website. Avoid the common beginner mistake of selecting a heavy, overly visual theme packed with dozens of built-in sliders and animations. These themes are notoriously unoptimised, resulting in bloated code that hurts your search engine performance.
Premium vs. Free Themes: The Core Distinctions
- Free Themes: Sourced directly from the official WordPress.org theme repository. They are strictly vetted for code safety and adherence to core development standards. However, they often lack advanced layout options, deep integration hooks, and direct developer support.
- Premium Themes: Purchased from specialised independent developers or curated marketplaces. They offer deep modular design frameworks, built-in layout hooks, premium starter templates, and dedicated support lifelines to troubleshoot code conflicts.
Recommended Performance Themes for 2026
- Astra (Free & Premium): An incredibly lightweight theme (requiring less than 50KB of resources on a clean installation). It is fully optimised for speed, scores perfectly on Core Web Vitals, and integrates with major block editors.
- GeneratePress (Free & Premium): A developer-favourite theme built with absolute code cleanliness as the priority. It focuses strictly on speed, accessibility, and clean HTML outputs, making it perfect for SEO-driven content sites.
- Kadence (Free & Premium): A modern theme featuring a highly versatile header/footer builder and native block integrations, allowing for deep layout customisation without performance degradation.
Step-by-Step Theme Installation
- Navigate to your WordPress dashboard sidebar and go to Appearance → Themes.
- Click the Add New Theme button at the top of the interface.
- Use the search bar to locate your preferred theme (e.g., type “Astra”).
- Hover over the theme card and click Install, followed immediately by Activate.
Plaintext
Dashboard ➔ Appearance ➔ Themes ➔ Add New ➔ Search ➔ Install ➔ Activate
Step 5: Install Essential Plugins for Security, Speed, and SEO
Plugins are modular software extensions that integrate directly into your WordPress framework to add new capabilities. While plugins are incredibly powerful, installing too many—or using poorly coded ones—will create database bloat, slow down your load times, and introduce potential security vulnerabilities.
The Core Foundational Plugin Toolkit
| Plugin Name | Structural Category | Functional Purpose | Recommended Core Configuration |
| Rank Math or Yoast SEO | Search Engine Optimization | Manages XML sitemaps, structures schema markup, controls index directives, and analyses content semantic density. | Enable auto-generated XML sitemaps and set global clean permalink patterns. |
| LiteSpeed Cache or WP Super Cache | Performance Optimization | Generates static HTML copies of dynamic PHP pages, minifies code scripts, and manages browser caching rules. | Enable page caching, turn on browser cache retention, and activate asset minification. |
| UpdraftPlus | Data Redundancy & Backups | Automates complete file and SQL database backups, sending them directly to secure, off-site cloud storage. | Configure automated weekly database and file backups linked to Google Drive or Dropbox. |
| Wordfence Security | Site defence & Firewalls | Deploys an enterprise-level endpoint firewall, monitors live traffic, and blocks brute-force login attempts. | Enable the real-time firewall; turn on automated scheduled file integrity scans. |
| WPForms or Fluent Forms | User Interaction | Builds secure, lightweight contact forms featuring integrated anti-spam protection honey pots. | Implement a simple contact form with Google reCAPTCHA or native silent honeypot fields. |
Step 6: Architecture Core Pages and Strategic Content Layout
Before launching your site to the public and submitting it for ad network monetisation reviews, you must build a logical architectural foundation. Google expects a legitimate website to provide clear transparency, user navigation paths, and compliance frameworks.
The Essential Non-Negotiable Pages
1. The Home Page
Your primary brand storefront. It should instantly answer three questions within the first three seconds of a user loading the page:
- What is this web property?
- What value does it provide to the reader?
- Where should the user go next (clear Call to Action)?
2. The About Page
A critical page for establishing your site’s E-E-A-T (Experience, Expertise, Authoritativeness, Trustworthiness) signals. Clearly outline your real-world background, your professional experience within your niche, and the core editorial standard behind your content generation.
3. The Contact Page
Provides a direct communication channel for users, brand partnerships, and ad network compliance inspectors. Implement a clean contact form alongside an explicit business email address (e.g.).
4. The Privacy Policy & Terms of Service
An absolute legal prerequisite for Google AdSense approval, GDPR compliance, and global privacy laws. This document must clearly state how you handle user data, cookies, and tracking scripts (such as Google Analytics).
Editorial Guide for AdSense-Compliant Content Creation
To secure Google AdSense approval, your content cannot be a collection of shallow, rehashed articles. Search engines look for high-value, original reporting that comprehensively satisfies a user’s search intent.
- another). Logical Text Hierarchies: Use only one
<h1>tag per post (reserved strictly for the main article title). Use sequential<h2>tags for major conceptual sections,<h3>tags for sub-arguments within those sections, and<h4>tags for deeper list breakdowns. Never skip a header level (e.g., jumping from one<h2>directly to another). - Deep Semantic Value: Avoid short, superficial write-ups. Write deep-dive, comprehensive articles (aim for 1,500 to 2,500+ words for competitive topics) that cover every facet of the subject matter.
- Original Asset Media: Enhance readability by including real, original media assets. When using images, always include contextual descriptive
alttext attributes within the HTML image tags. This ensures accessibility for visually impaired users and passes strong indexation signals to search crawlers.
Step 7: Technical and On-Page SEO Optimization Protocols
Search Engine Optimisation (SEO) is the process of configuring your site’s technical infrastructure and content layout to maximise organic visibility on search engines.
Essential WordPress Settings Configuration
to the post Before optimising individual posts, you must adjust a critical default setting in your WordPress dashboard. Navigate to Settings → Permalinks. Change the default structure from the unoptimised plain format to post name.
Plaintext
Settings ➔ Permalinks ➔ Select "Post name" ➔ Save Changes
This transforms a messy URL into a clean, human-readable structure that search engines prefer:
- Unoptimised URL:
[https://example.com/?p=5843](https://example.com/?p=5843) - Optimised URL:
[https://example.com/how-to-start-wordpress-site/](https://example.com/how-to-start-wordpress-site/)
The 5-Point On-Page Checklist for Every Article
- subheadings. Strategic Primary Keyword Placement: Place your core target keyword naturally within the first 100 words of your introduction, inside the primary
<h1>title, and within at least two subheadings (<h2>/<h3>). - Meta Description Optimised Metadata Fields: Craft an engaging meta title under 60 characters that leads with your target keyword. Write an actionable meta description under 160 characters that summarises the article and includes a clear call to click.
- Media Asset Compression: Never upload raw smartphone or stock photography files directly to your WordPress database. Large images will slow down your site’s load speed. Run every file through a compression tool like TinyPNG to convert it into a highly efficient
.webpformat before uploading. - Internal Linking Strategy: When publishing a new article, link to 3–5 of your existing relevant posts using descriptive anchor text. This distributes link equity (ranking power) across your site and helps search engine spiders crawl your content more efficiently.
- External Authority Referencing: Link out to 2–3 high-authority, non-competitive external websites (such as university studies, official documentation, or trusted industry reports) to back up your claims and build topical trust.
Step 8: Final Deployment Pre-Flight Checklist and Site Launch
Before sharing your new website with the world, run through this rigors technical quality control checklist to ensure your site is completely stable, secure, and ready for traffic.
The Pre-Flight Technical Audit
- [ ] Validate Universal SSL Encryption: Load your site in an incognito browser window. Check that the security padlock icon is present in the browser address bar and that all HTTP traffic automatically redirects to secure
https://URLs. - [ ] Verify Contact Form Functionality: Run a test submission through your contact forms. Confirm that the data is successfully captured in your database and that notifications arrive reliably in your email inbox without going to spam.
- [ ] Perform Multi-Device Responsive Testing: Open your website on a desktop, a tablet, and a smartphone. Ensure that headers scale down properly, multi-column layouts stack logically, font sizes remain easily readable, and no elements overflow horizontally.
- [ ] Review Search Engine Visibility Flags: Navigate to Settings → Reading. Ensure the checkbox next to “Discourage search engines from indexing this site” is completely unchecked. If this is turned on, search engines will drop your site from their index.
Plaintext
Dashboard ➔ Settings ➔ Reading ➔ "Discourage search engines..." ➔ MUST BE UNCHECKED
- [ ] Connect to Google Search Console: Head to the official Google Search Console web portal. Verify your site ownership using the DNS record or HTML tag method. Submit your primary XML sitemap URL (typically located at it) to prompt Google to begin crawling and indexing your pages.
The Top 10 Mistakes Beginners Make (And How to Avoid Them)
- Using Overly Complex Domain Names: Choosing long names filled with hyphens and numbers makes it incredibly difficult for users to remember your URL, which hurts your long-term brand equity.
- Choosing Cheap, Unreliable Web Hosting: Opting for bottom-tier hosting to save a couple of dollars a month usually backfires. Slow load times frustrate users and negatively impact your search engine rankings.
- Installing an Excess of Inactive Plugins: Accumulating dozens of plugins degrades your site’s speed, creates software conflicts, and leaves your site open to security breaches. Keep your active plugin footprint small.
- Neglecting Regular Automated Backups: Relying blindly on your hosting provider for data retention is a risky move. Always maintain your own independent, off-site backup system using tools like UpdraftPlus.
- Failing to Secure the Admin Access Point: Leaving your admin username set to a generic term
adminand using a weak password makes your site an easy target for automated brute-force attacks. - Leaving the Site Indexing Block Active: Forgetting to uncheck the search engine visibility block in your settings after finishing development will keep your site completely invisible on Google search results.
- Publishing Plagiarised or Rehashed Content: Copying or slightly modifying text from other websites is a surefire way to get penalised by search engines. This practice will result in an immediate rejection from ad networks like Google AdSense.
- Ignoring Mobile Responsiveness: Design your pages with a mobile-first mindset. Over 60% of global web traffic comes from mobile devices, meaning your site must look and perform flawlessly on small screens.
- Overlooking Image Optimisation: Uploading massive image files directly from cameras or stock sites will quickly bloat your pages and slow your site down. Always compress your media assets before uploading them to WordPress.
- Using Inconsistent Permalink Structures: Changing your URL permalink structures after your pages have been indexed by search engines creates broken links, destroying your hard-earned search rankings. Lock in a clean post-name structure from day one.
Frequently Asked Questions
Q1: Can I set up and run a professional WordPress website entirely for free?
No. While the core WordPress software itself is open-source and completely free, deploying a self-hosted website requires a registered domain name and an active web hosting account. Expect a baseline investment of roughly $3 to $10 per month for entry-level setups.
Q2: What is the exact difference between WordPress.com and WordPress.org?
WordPress.org is the self-hosted, open-source version of the software where you retain complete ownership of your site files, databases, and monetisation methods. WordPress.com is a commercial, closed hosting service run by Automattic. It restricts monetisation and plugin access unless you subscribe to their high-tier, expensive plans.
Q3: How much traffic does my site need before I can qualify for Google AdSense approval?
Google AdSense does not enforce a rigid minimum monthly traffic requirement. Instead, their approval process focuses heavily on content value, original reporting, a clean user experience, and the presence of mandatory compliance pages (such as an explicit Privacy Policy and clear About/Contact pages).
Q4: Will I need to learn coding or programme in PHP to build a custom layout?
Not at all. The modern WordPress ecosystem is built around visual page creation. By leveraging the native block editor or integrating flexible drag-and-drop page builders like Elementor, you can build complex, multi-column designs completely visually.
Q5: Is it possible to migrate my site to a different hosting provider down the road?
Yes, WordPress is completely portable. If your current hosting provider suffers from frequent downtime or slow speeds, you can export your entire database and file repository using free migration plugins (such as All-in-One WP Migration). This allows you to transfer your asset to a new host with zero data loss or downtime.
Conclusion: Your Next Action Steps
Building a successful WordPress website is a marathon, not a sprint. Success comes down to taking consistent, structured action. Now that you have the entire blueprint, it’s time to put it into action.
- Secure your branding: Register your target domain name using a trusted provider like Namecheap or Hostinger.
- Establish your hosting foundation: Purchase a reliable, high-speed hosting plan that fits your current budget and growth goals.
- Deploy and protect your site: Run the automatic one-click WordPress installer, set up strong login credentials, and activate your SSL encryption.
- Install a lightweight theme: Activate a clean, speed-optimised theme like Astra or GeneratePress to keep your site fast and nimble.
- Build high-value content: Write comprehensive, deep-dive articles designed to genuinely help your readers and establish your authority.